Custom Nostr verification using github pages
owning your own verification on the cheap.
Recently, I discovered Nostr while experimenting with the OpenVibe app, which enables participation in Threads, Bluesky, and Mastodon. After integrating these three platforms, I noticed Nostr as an additional option. While I am not yet familiar with it, this discovery led me to explore further during my time at DotNet Conf.
My recent interest in RSS stems from its potential as a tool for publishing calendar events and comments for a meetup platform I am conceptualizing. Nostr appears to be the real-time chat equivalent of RSS, offering additional features. As an open platform, utilizing Nostr will require some technical expertise.
Verification
Nostr is an open platform, so it can be challenging to distinguish between bots and people. With no central authority to create a user, any user name can be made. To verify yourself (and obtain a checkmark next to your name), you need to be verified. There are many documents online that point to various crypto wallets and services capable of publishing your verified key. The crypto community is not interesting to me so I’m going to be independent.
For creating a mark@nostr.marks.wiki Nostr address, two things are needed: control over the DNS and a web server. GitHub Pages will be used for the web server.
When a user is created for the first time using any Nostr client, public and private keys are generated. It is important to write these down as they will be needed.
Create the repo and pages
Create a public repo for your site, turn on github pages, and add a /.well-known/nostr.json file. Sorry, but I’m not going to explain that parts, ask Copilot.
You can check the PIP for the proper format. That string of numbers is the hex equivalent of my public key. Not sure why you need the hex version of the key. If you need to convert you key to hex, use this: https://damus.io/key/
This file should qualify for the certification procedure, but github pages will not automatically publish this file for you. You need to tell it include this by adding a _config.yml file like so:
Now we have the code in place, next is publishing it on the web.
Domain wrangling
Proving that you own your domains means having access to your DNS. Github will want to verify your domain ownership and github pages will want to see some proof as well for your site.
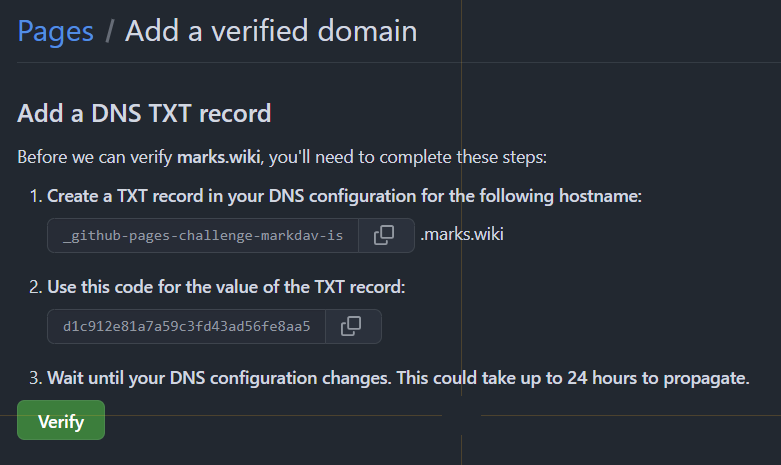
Deep in your github settings is a way to add a domain. When you do, it gives you some instructions for creating a TXT record. Follow those at your DNS host.
Once this is set up, your repository also needs information about the specific domain that will host your website. Here is where I added the `nostr` subdomain to my page.
This part was a little tricky, but by digging in the docs I found the instructions that require this subdomain to point to your personal github URL. [username].github.io.
Now, with all this in place, I should be able to test it by navigating to nostr.marks.wiki/.well-known/nostr.json
And with that tested I should be able to get verified by using mark@nostr.marks.wiki using any OpenVibe Client.


